
Build a Crate to Ship a Leaded Glass Panel
By Josephine A Geiger
© 2023 J.A. Geiger Studio, LLC
Download PDF here (opens new window)
Building a crate to ship your artwork safely and securely is a great value to add to any artist’s skill set. This is my tried-and-true method for building crates to ship my leaded stained-glass artwork across the country, and can also be applied to mosaics or framed paintings with some minor modifications.
The key to packing and shipping glass is to eliminate the wiggle room. Movement within the box/crate is mostly what causes the breakage. And lots of bubble wrap alone will not work as the weight of the panels and the hard edges pop the bubbles, which creates wiggle room in transit and more breakage risk.
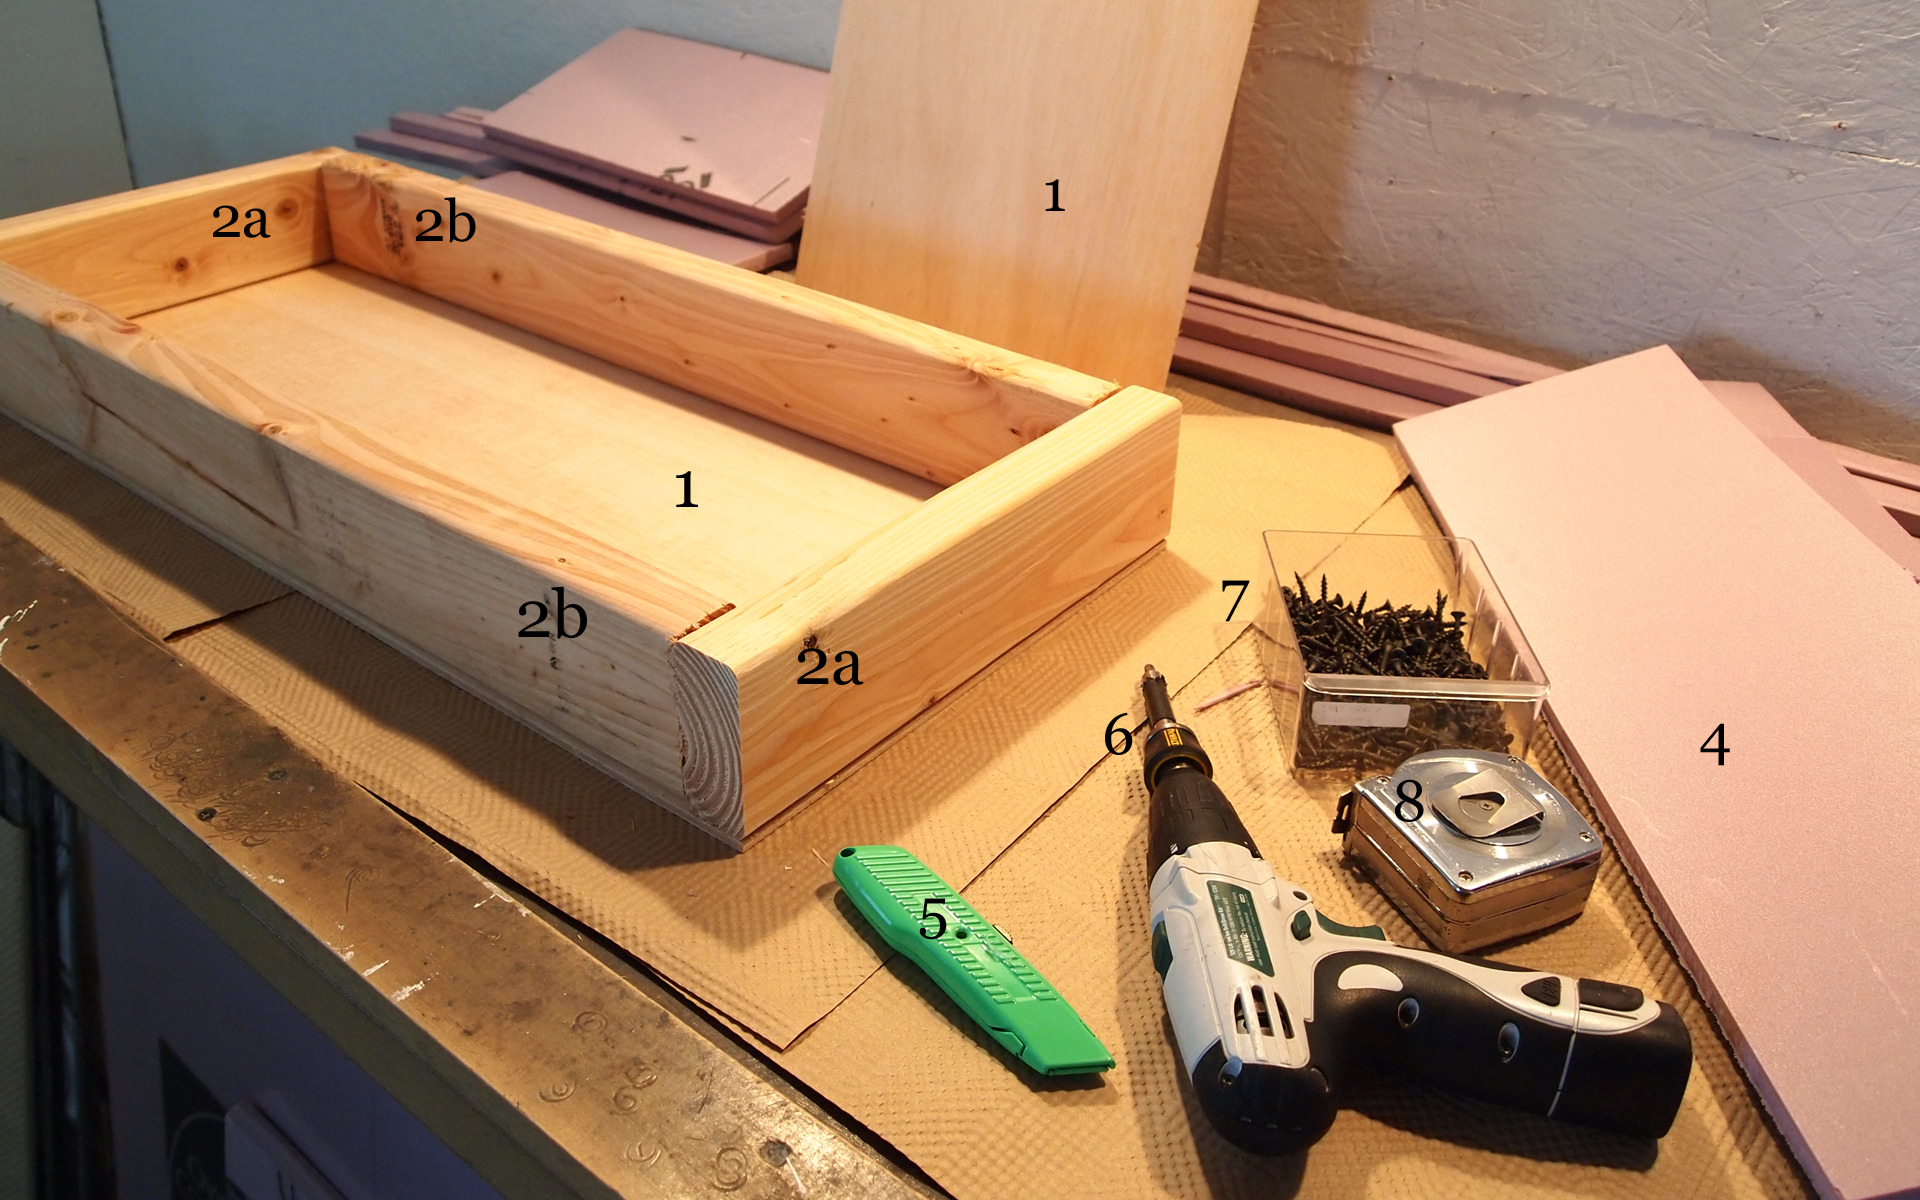
Materials List
- ¼” to ½” plywood (or Luan)
- 2x4 (or 2x6) for short edge, or 2b. 2x4 (or 2x6) for long edge
- sharpie, bubble wrap or foam packing, packing tape, sheet cardboard, packing paper sheets
- ½” or ¾” or 1” rigid insulation
- utility knife
- .screwdriver / screw-gun
- 1-½” drywall screws work for the plywood sides, plus 3-½” construction screws (not shown) for the 2x4 corners
- tape measure
Step One | Measure & Wrap Panels
Measure the length, width, and depth of your artwork – including integral hooks or framing. Then add the width of the 2x edges (1-½” x2 = 3”) plus another 2-4” for the rigid insulation. The bigger the panel (and crate) the more rigid insulation you might want to account for on the edges.
In these images, I was packing 3 panels, 2 the same width and the 3rd panel 4” wider, and all the same length, so the crate size is based off the LARGER panel dimension of 12x30”.
The panels here have 1 layer of 3/16” bubble wrap (or 1/8” foam works well for larger panels) around the paper wrap for cushion. The paper keeps the plastic from sticking to the panel.
The 2 smaller panels are sandwiched with a layer of cardboard, then bubble-wrapped together.
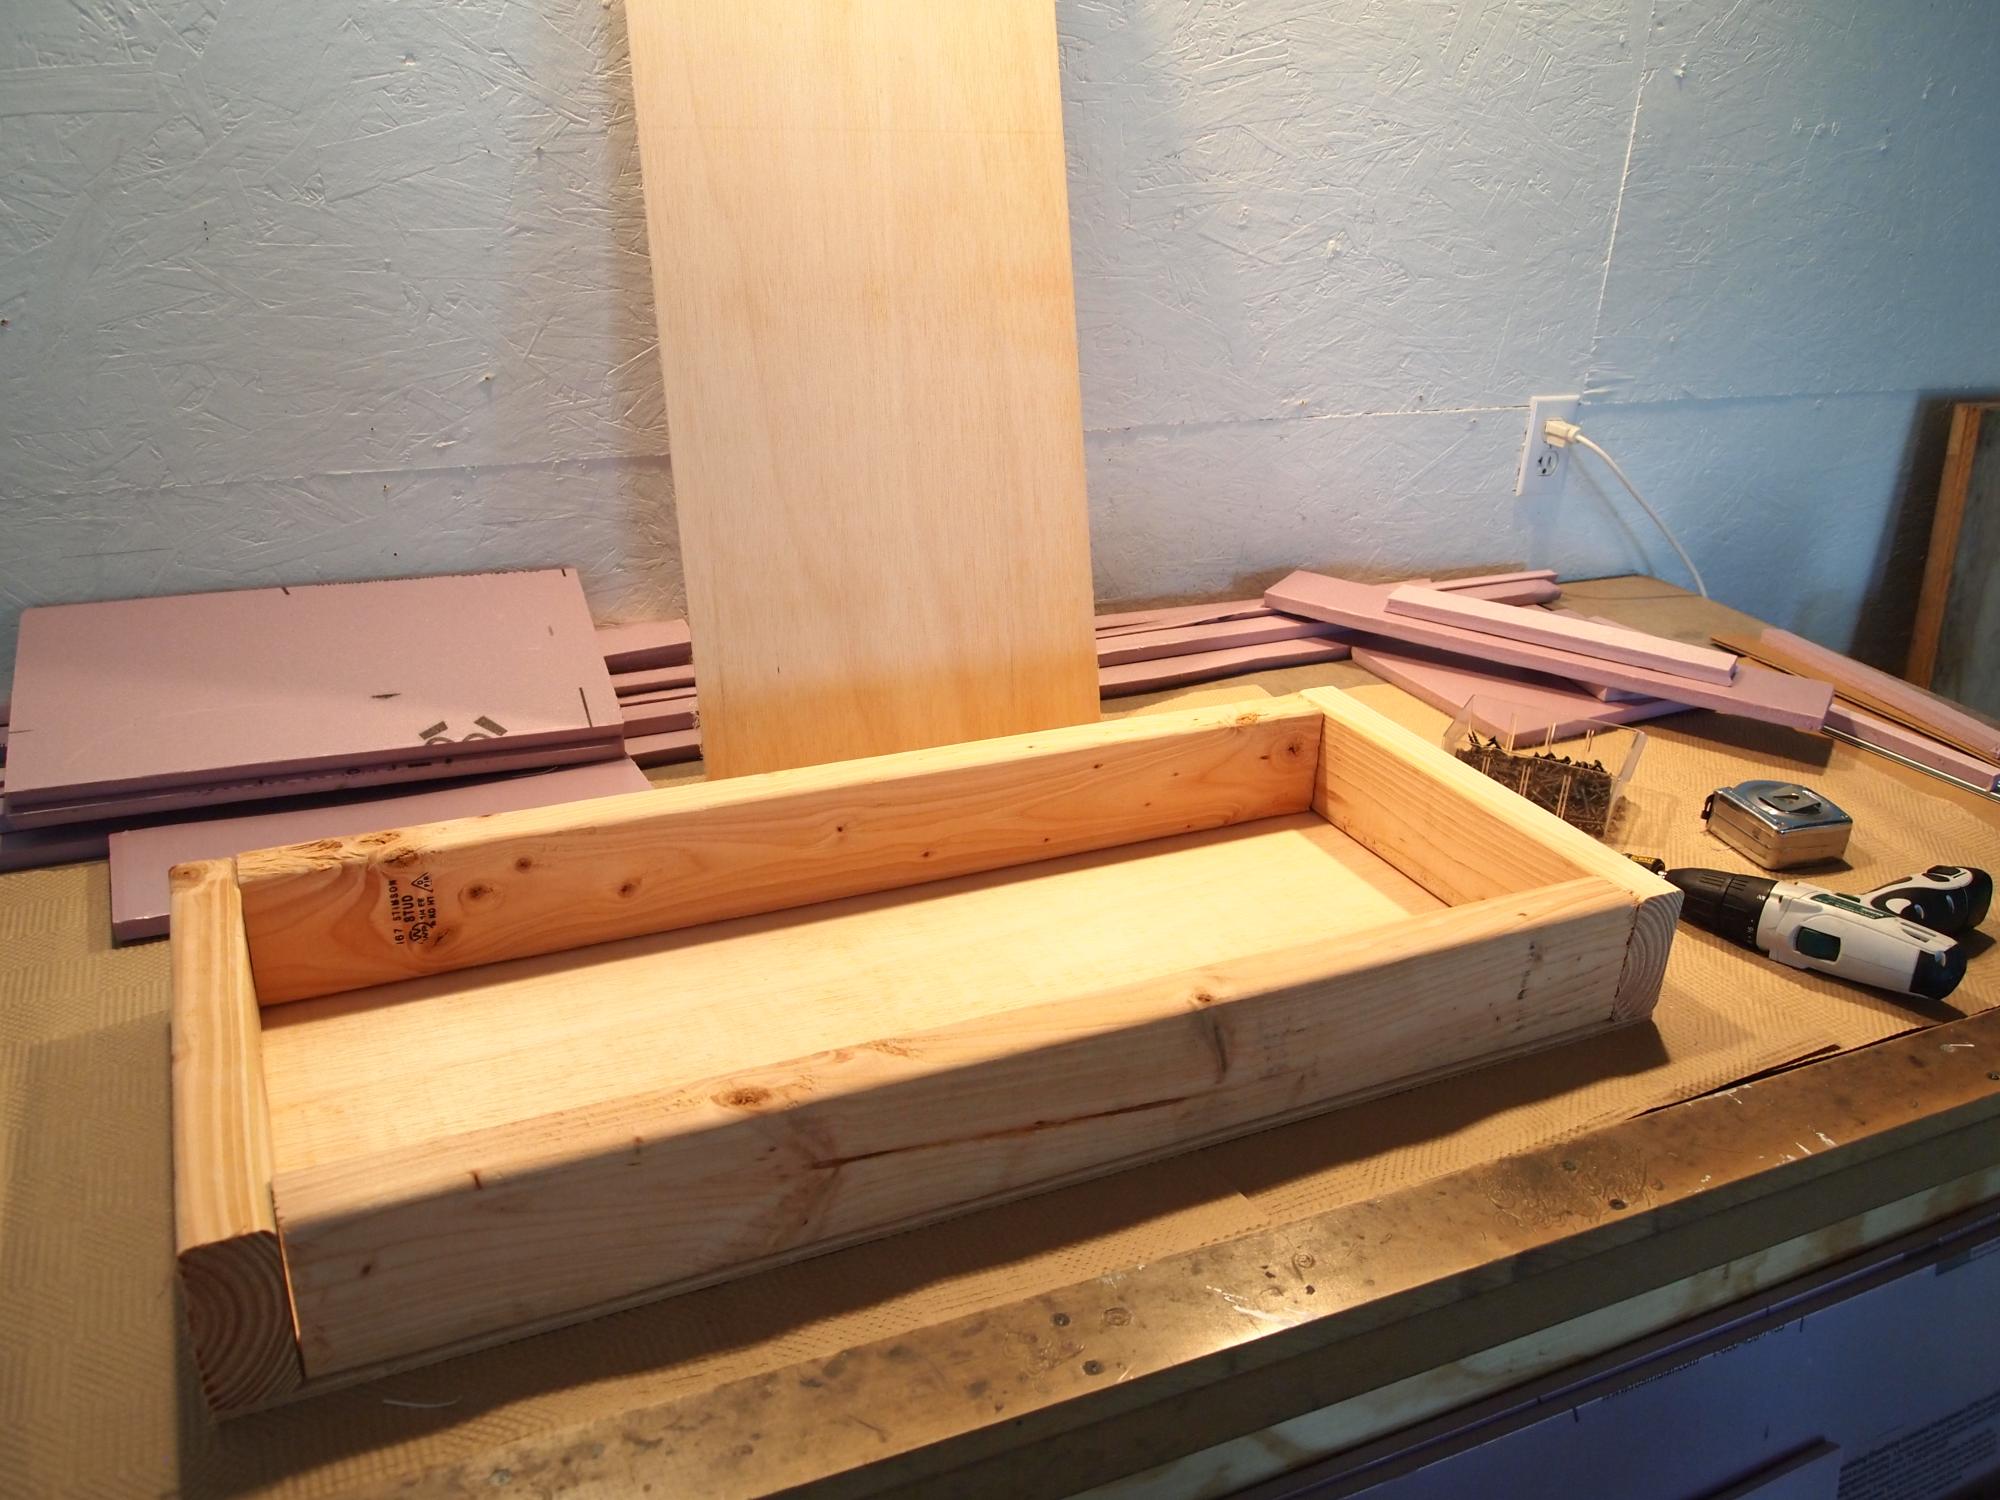
Step Two | Cut Lumber & Build Crate
The 12”x30” panel of the 3 panels dictates the crate size:
- 2 pieces of 1/4" Luan plywood, 17”x 35”
- two 2x4’s 17” long (short edge of the crate)
- two 2x4’s 32” long (long edge minus the 3” width of 2x4’s)
Use the construction screws (2-3 per corner) to screw together the 2x4 frame – pre-drilling helps prevent splitting the wood ends.
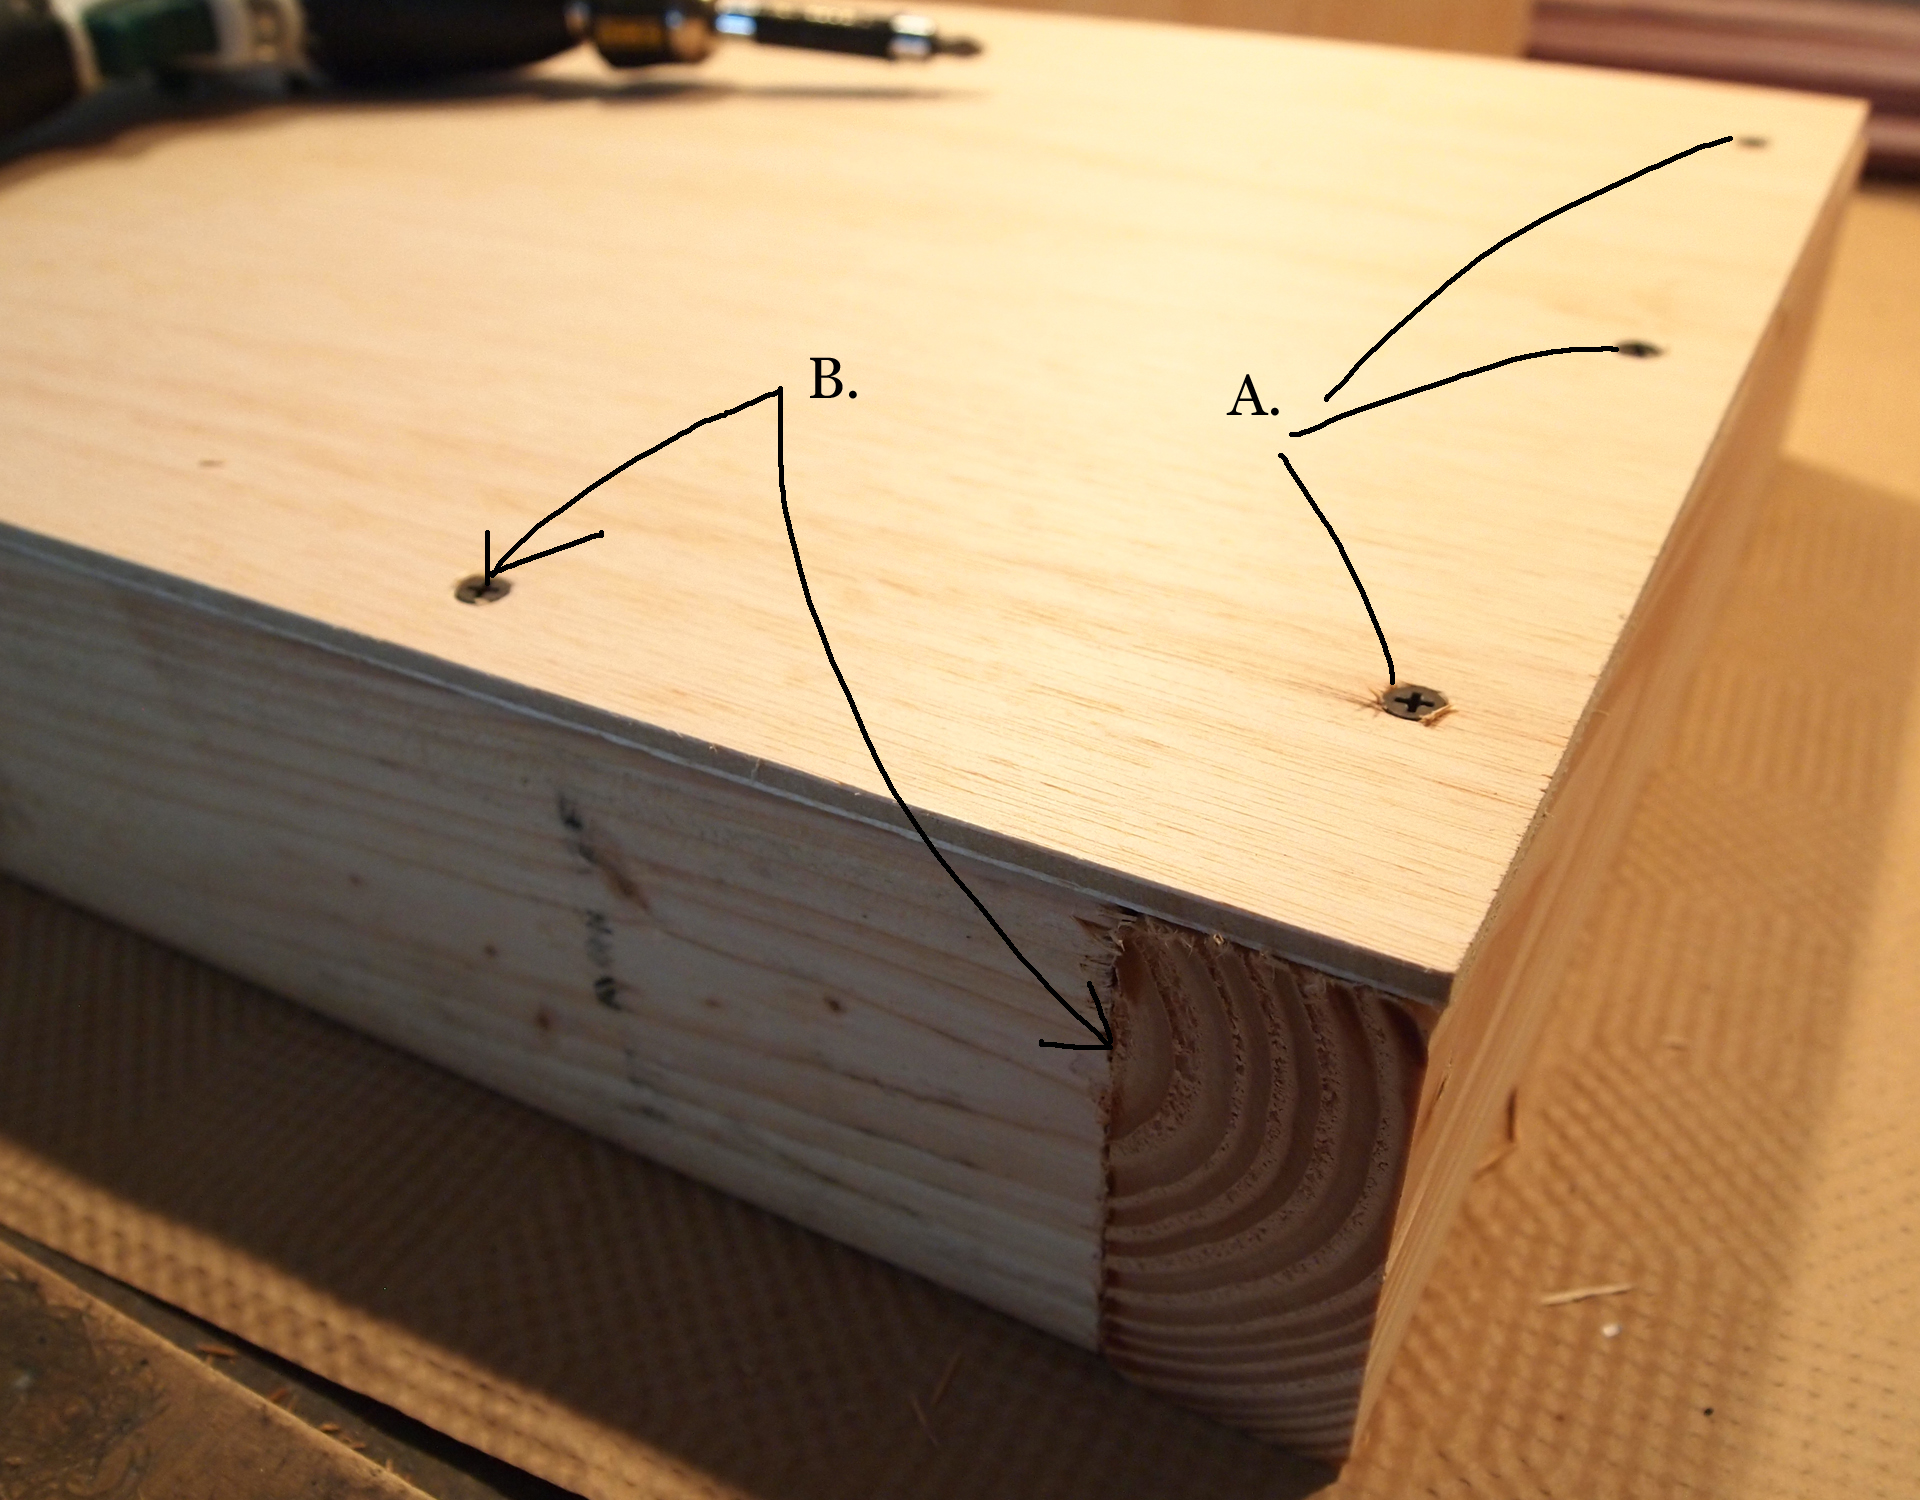
Securely screw one of the plywood sheets to the frame. I space screws about 10-16” apart, and within 3” of each corner.
TIP #1 | Go to Home Depot with the cut list and have them cut all the pieces, then screw it all together in the
studio.
Step Three | Pack the Crate
Cut the rigid insulation to fit crate dimensions:
- 1 piece of 14x32” ¾” rigid insulation
- two 14” x 2-¾” lengths of ¾” insulation
- two 30-½” x ¾” lengths of ¾” insulation
- 1 piece of 30-½” x 12-½” ¾” insulation
- other pieces, cut to fit as you pack
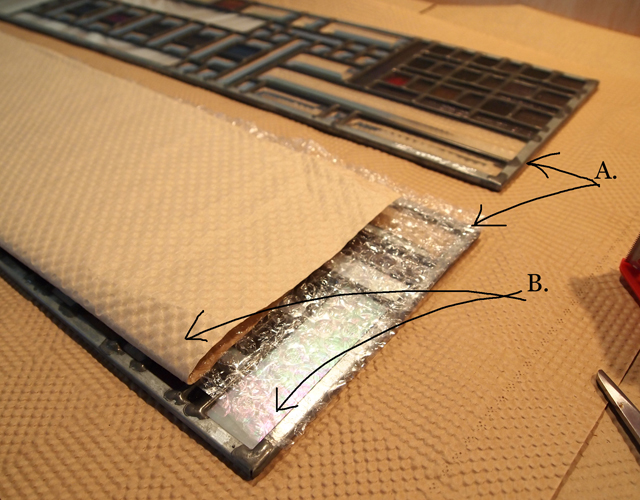
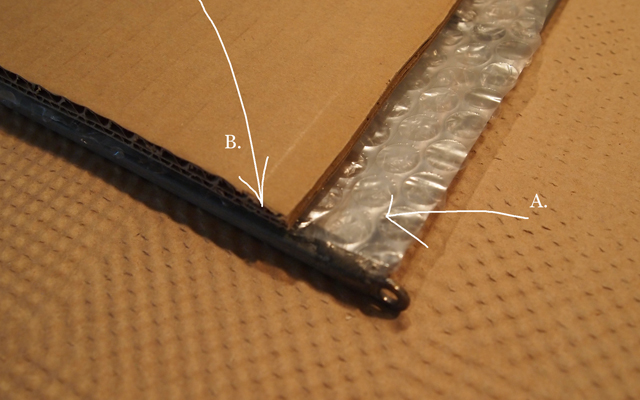
Insert the 14x32” piece to the bottom of the crate, then line the edges with the strips to the top of the crate. (see A. in photo below)
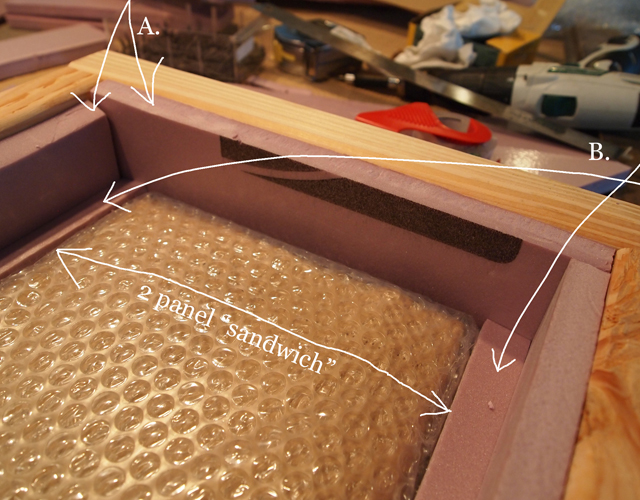
Since this crate has multiple panels, place the smaller panel sandwich into the crate.
NOTE: If there is a gap at the top of bottom, insert pieces of rigid insulation or cardboard spacers across the panel width.
Add a 1” deep rigid insulation spacer equally between the panels and crate edges. (see B. in photo, above )
NOTE: the spacer strip is the height of the sandwich panel and fits between the panel and sides.
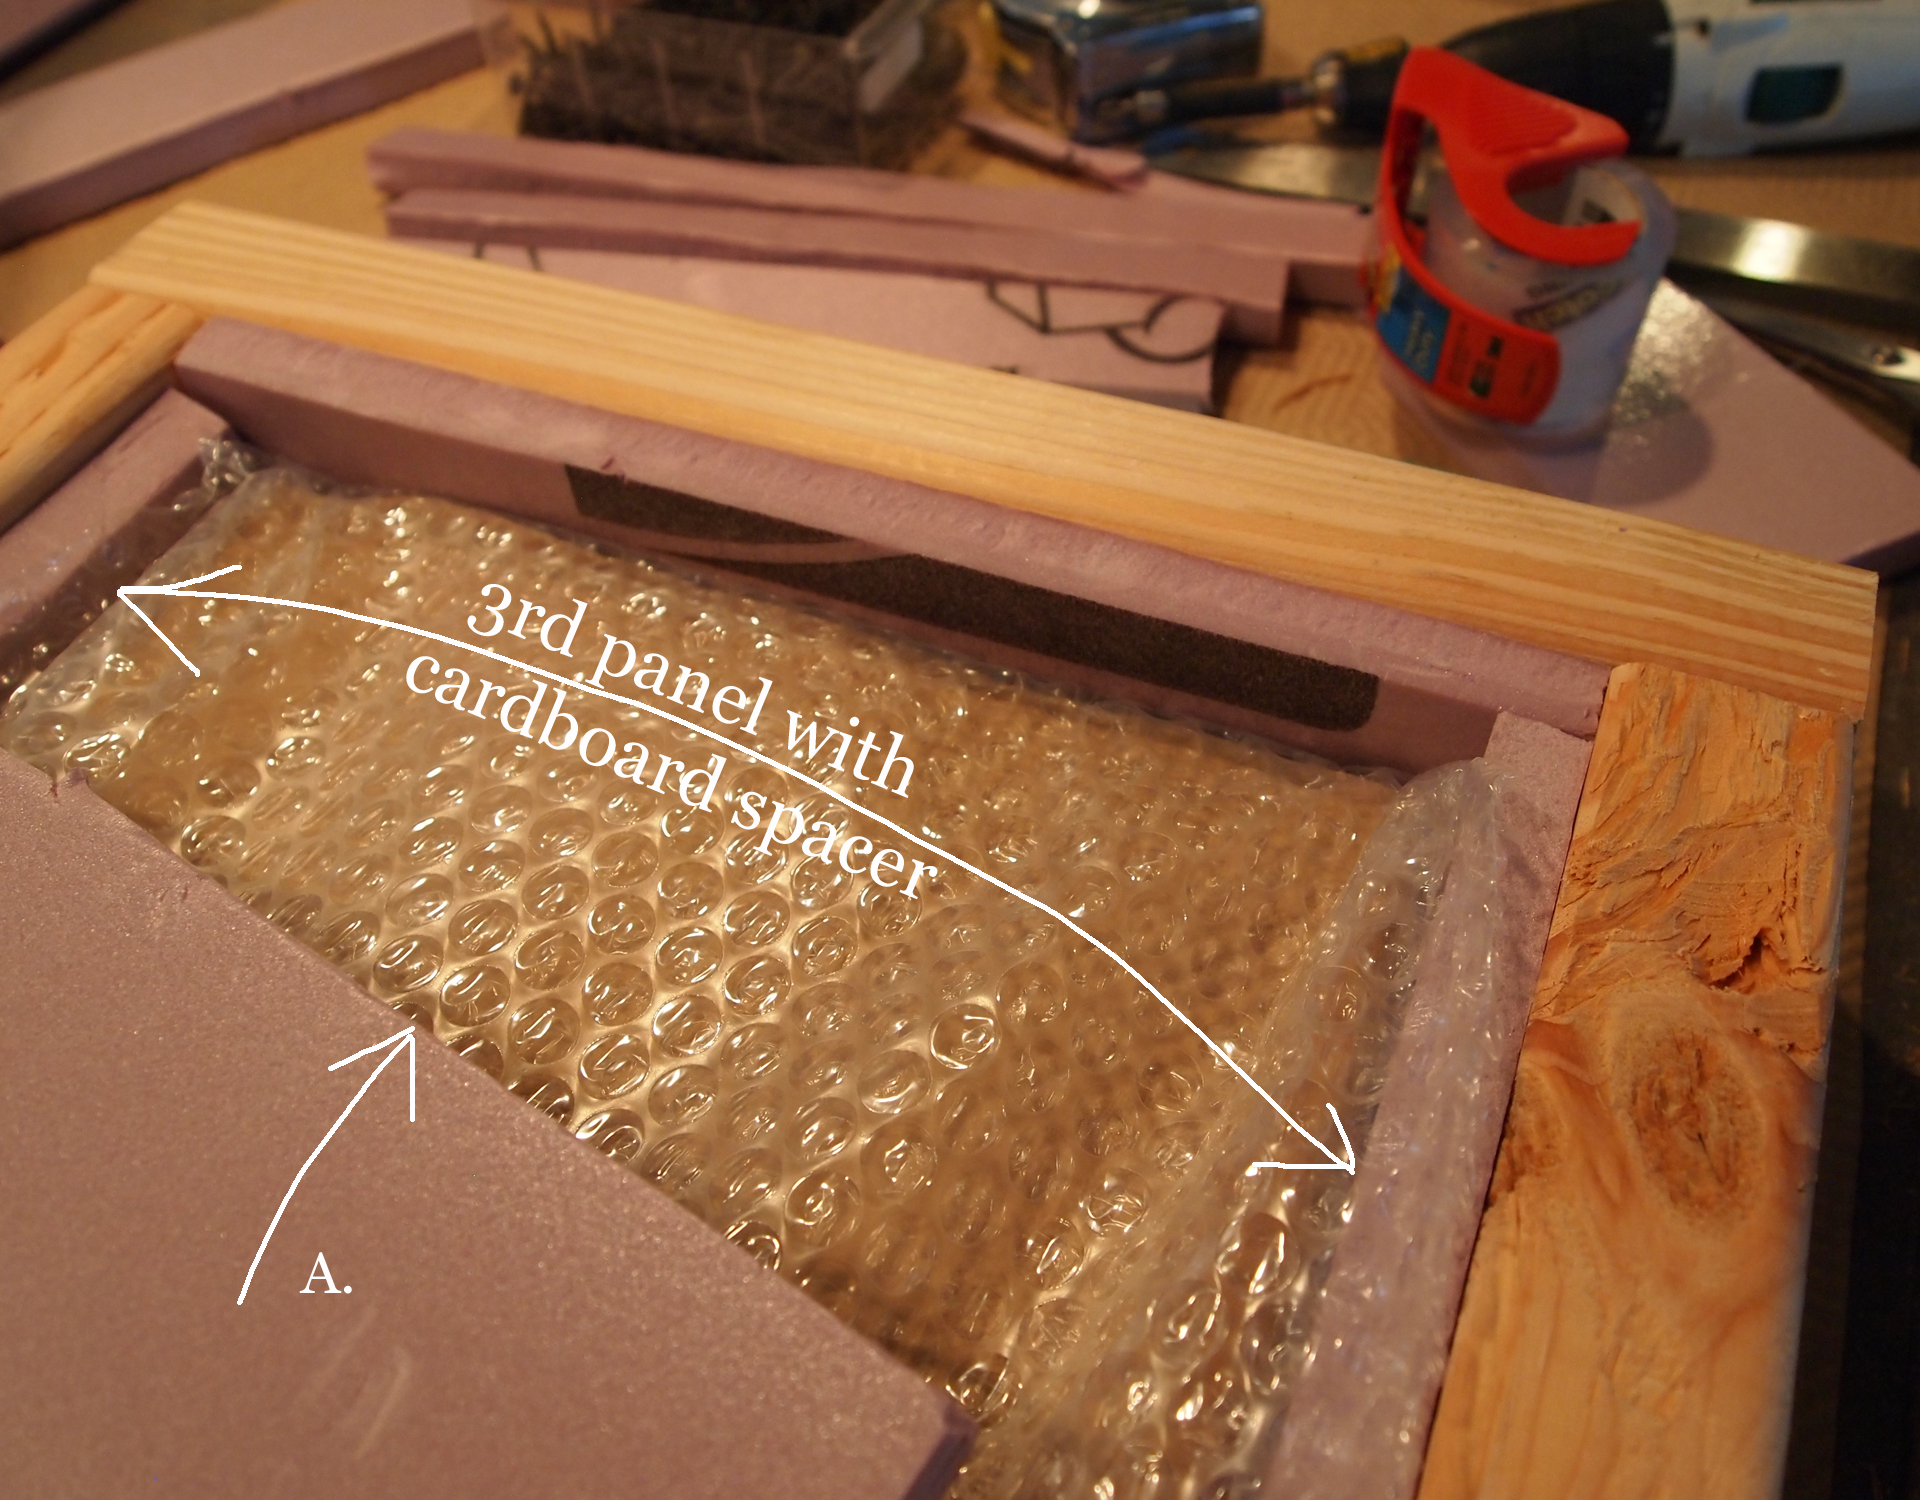
Insert a carboard spacer for the 3rd wrapped panel. This should fit inside the rigid insulation sides and on top of the smaller panel spacer. Make sure there are no gaps between the cardboard and the smaller panels underneath.
Place third wrapped panel on top of the cardboard. Insert final piece of rigid insulation, should fit snugly between the side insulation strips. (see A. in photo below )
TIP #2 | Gently shake the crate – make sure there is no wiggling. If there is, unpack, add more spacers, repeat.
Step Four | Seal the Crate
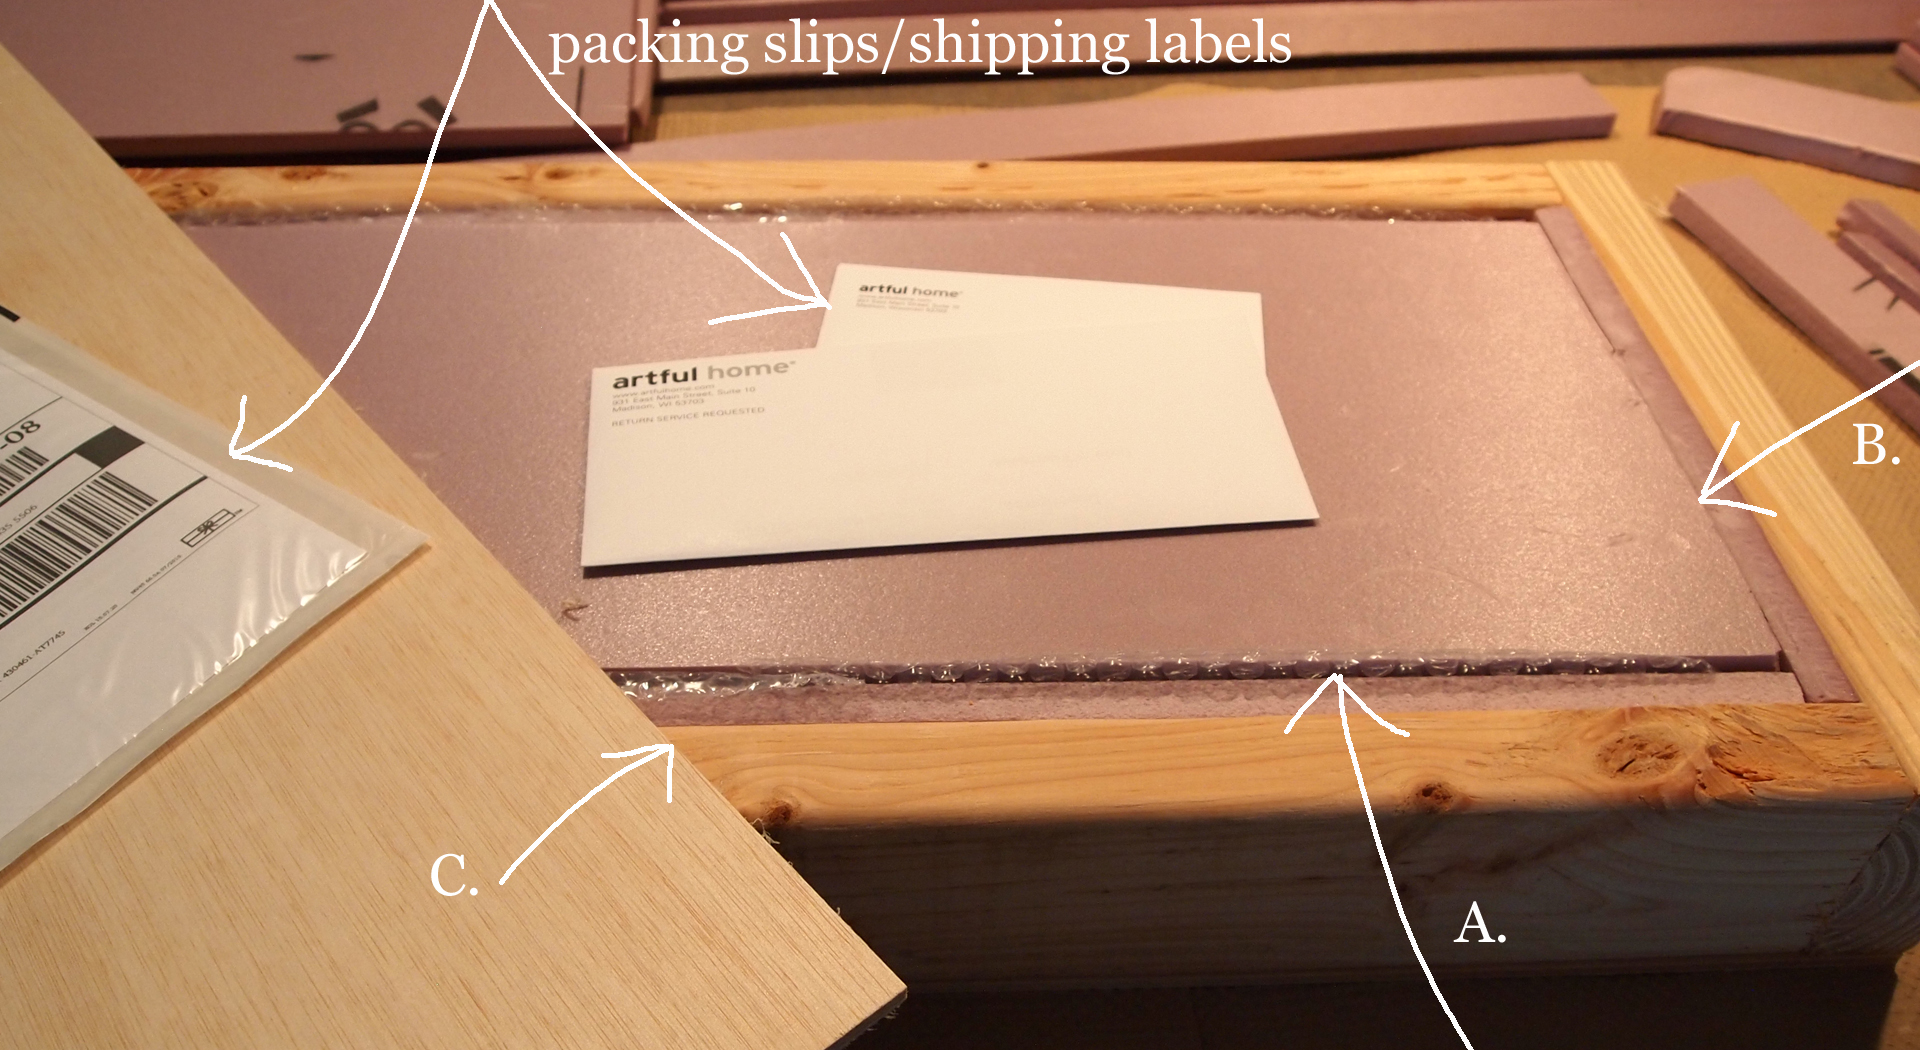
Once the crate has been packed, place the top sheet of plywood on the frame, and tack in place with a couple of screws – enough to hold it all in place. (see C. in photo, below)

Check to make sure it is tight. This is the last wiggle test – pick up the crate, and shake it (or if it is large, tip it up and shake). If it is loose, you will be able to feel the panels shifting inside.
IMPORTANT! If you feel movement, take the plywood cover off, un-pack the panels and cut another piece of insulation or add a layer of bubble or a piece of cardboard to make it tight.
If there is a ¼” gap for wigging, for example, layer some bubble wrap with layer(s) of cardboard to add some stiffness without compromising what I refer to as the ‘crush-factor’ – don’t use too much bubble wrap here because if it does get dropped, the bubbles pop and create wiggle room, increasing the risk for breakage.
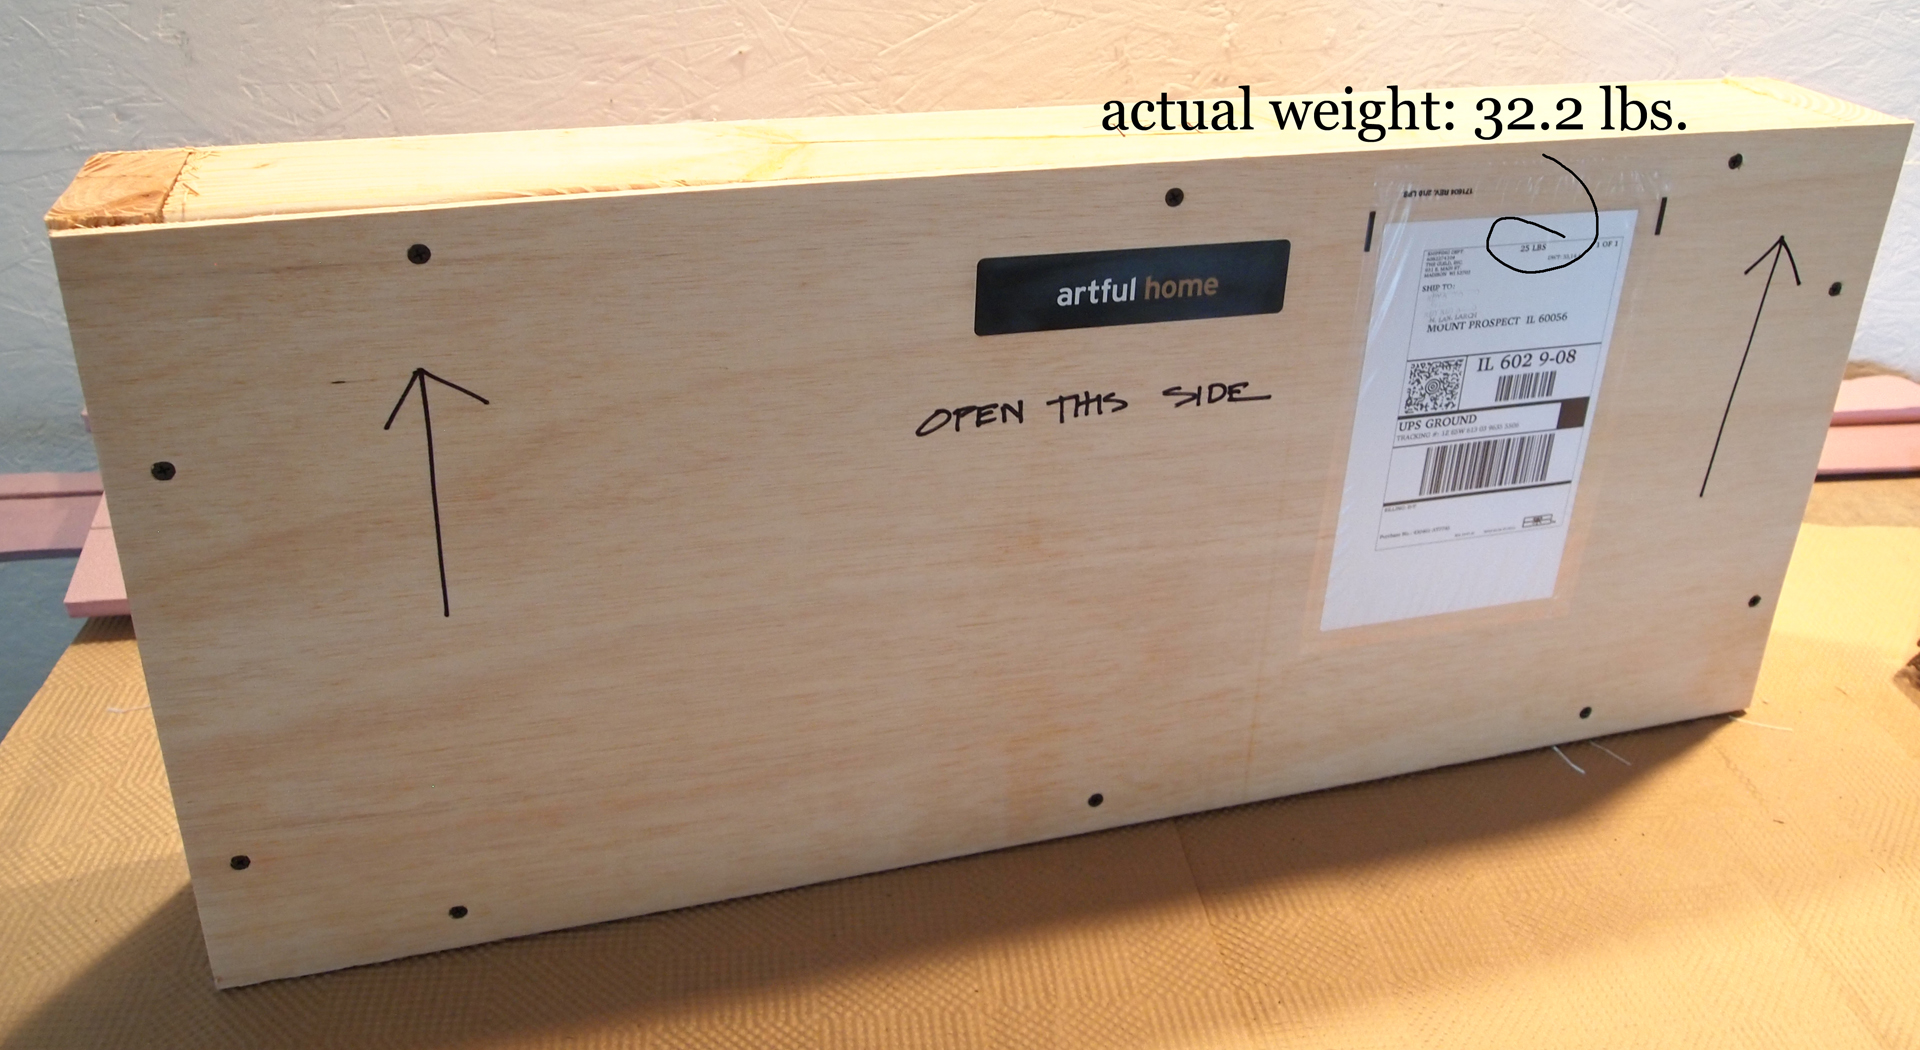
Now that the panel is tightly set within the crate, add the packing slip and/or unpacking directions, and securely screw the plywood cover to the frame, with screws spaced about 10-16” apart and within 3” of each corner.(see photos below)
Attach the shipping label. Mark crate “This Side UP“ with stickers AND arrows drawn with a Sharpie along with a note to “OPEN THIS SIDE” (see photo below)
Bonus TIPS & NOTES
- When packing large multiple panels, use 1/4" – 3/8” luan or plywood
- as a separation between panels, and wrap each panel individually(see step one above )
- Pay attention to the overall size of the crate, and the restrictions of shipping with USPS, FedEx, or UPS – they have maximum sizes for weight, height, and width. As a general rule of thumb, if the crate (and the precious contents!) is too big, it is at risk to fall off a conveyor belt or roller slide, then explore shipping via Freight.
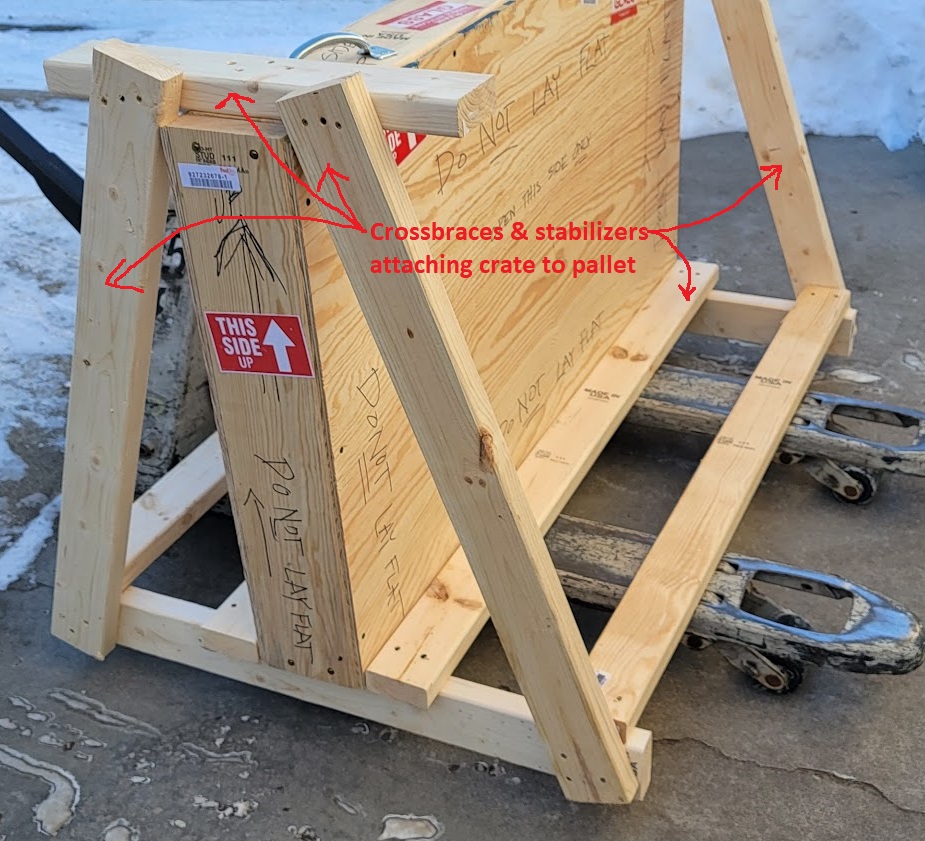
- LTL Freight will likely require the crate to be palletized. That just means it needs to have some crossbracing attaching it to a packing pallet. This allows for a pallet-jack or forklift to pick up the pallet and crate. (see photo, below )
- Standard pallet sizes are 48x40” (GMA pallet), and then 42x42” and 48x48.”
- Pallets can usually be found through various shipping companies, or maybe at a lumber store (Menards usually has a pile of them available).
TIP #3 | Resource for LTL shipping: https://www.freightquote.com/
This crate (and pallet) was built to ship three 24”x48” panels from MN to CA using this crate packing method and building a custom pallet for LTL freight shipping.
I have never had a panel break in transit packing this way. Well, except for the crate that had forklift tire tracks on it – that crate had a single piece of glass cracked, in the 36x36” panel being shipped, from the forklift impact.